Are you interested in hatching quail eggs, but don’t have access to an incubator? Don’t worry, hatching quail eggs without an incubator is possible, and in this article, we’ll show you how.
Not only is hatching quail eggs without an incubator a useful skill to have, but it can also save you money. Incubators can be expensive to buy, and using a homemade incubator can be a cost-effective way to hatch your quail eggs.
Quails are known for their hardy and tiny stature, making them an interesting pet for many modern families. Unfortunately, most quails do not get broody, making it difficult for the quail eggs to hatch on their own. Therefore, breeders often have the responsibility to incubate the quail eggs.
We’ll guide you through the step-by-step process of creating a homemade incubator using simple household items, such as a box, lamps, hand warmers, or heating pads. With a little patience and attention to detail, you can successfully hatch your own or store-bought quail eggs.
Read on to learn how to hatch quail eggs without an incubator and start your quail-raising journey today.
Interactive Infographic About Quails

Quail Information
Quails are fascinating birds that belong to the same family as pheasants and partridges. There are several different species of quails, but the ones commonly raised for their eggs and meat are the Japanese quail and the Coturnix quail. These birds are known for their small size and fast growth, and they are relatively easy to care for.
Quail Fun Fact
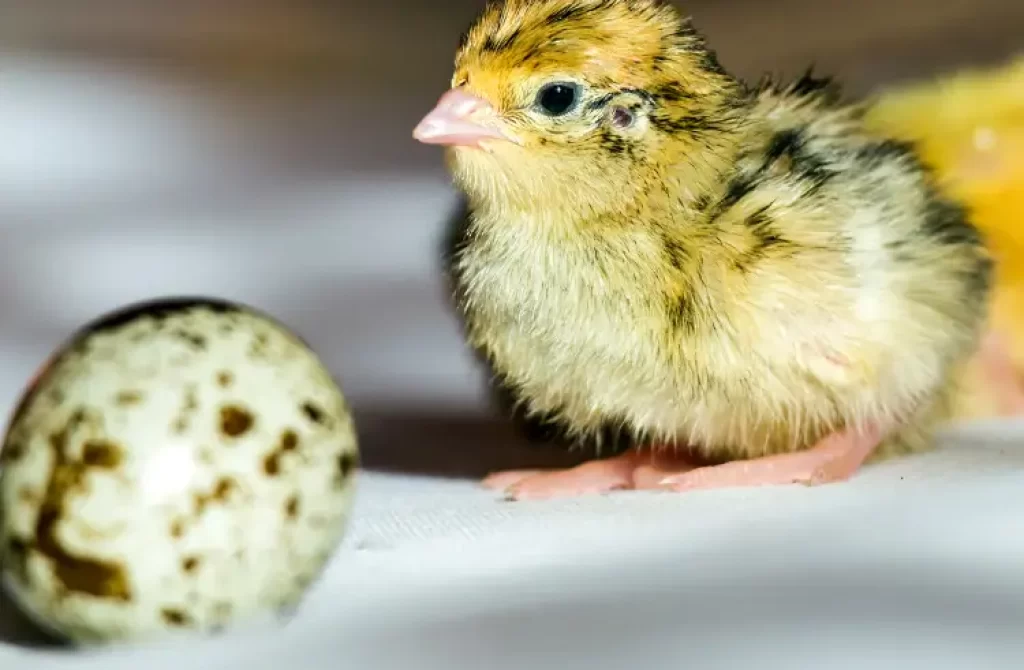
Quail chicks are born with feathers and are able to walk and eat within hours of hatching. The average lifespan of a quail is about 2-3 years in the wild and up to 5 years in captivity.
Click Twice to see the information!
Preparing to Hatch Quail Eggs
Before you start hatching quail eggs, it’s important to select fertile eggs from healthy quail. This will increase the likelihood of a successful hatch. To check if an egg is fertile, you can look for a small bullseye pattern on the yolk.
When storing quail eggs before hatching, it’s important to keep them at room temperature, around 99-101°, and avoid direct sunlight. Turning the eggs at least three times a day will also help prevent the yolk from sticking to the shell.
To hatch quail eggs without an incubator, you will need a few materials and tools. First, you’ll need a warm, dark place where you can keep the eggs.
A container with a lid, such as a plastic container or a cardboard box, can be used to create a makeshift incubator.
Other materials you may need include a thermometer to monitor the temperature and some damp paper towels to maintain humidity levels. A heat source, such as a lamp or hand warmers, can also be used to provide warmth.
In the next section, we’ll guide you through the step-by-step process of creating a homemade incubator to hatch your quail eggs
Hatching Quail Eggs
Now that you have prepared the materials and tools, it’s time to start hatching quail eggs without an incubator. Follow these steps for the best chance of a successful hatch:
Prepare the container
To prepare the container for hatching quail eggs without an incubator, begin by lining the bottom with damp paper towels to provide moisture.
Then, place a thermometer inside to monitor the temperature. It’s important to maintain a consistent temperature of around 99-101°F, which you can achieve by using a lamp or hand warmers as a heat source.
Make sure to position the heat source in a way that won’t directly touch the eggs, and check the temperature regularly to ensure it stays within the desired range.
Note: Using a thermometer and heat source to regulate the temperature is necessary for successful hatching.
Place the eggs in the container
Carefully place the eggs in the container with the pointy end facing down. Make sure not to overcrowd the container, as this can affect the hatching process.
Keep the eggs warm and moist
To keep the eggs warm and moist during the hatching process, cover the container with a lid or plastic wrap.
This helps to maintain the humidity levels and prevent moisture from escaping. To ensure that the eggs stay moist, you may need to periodically add water to the paper towels.
You can check the moisture level by observing the condensation on the inside of the container.
If the paper towels look dry, add some water to keep them damp. Remember to handle the eggs with care and avoid unnecessary movement or disturbance to prevent damaging the developing chicks.
Monitor the eggs
To monitor the eggs during the hatching process, it’s important to keep the container closed as much as possible to avoid temperature fluctuations and unnecessary movement. This helps to create a stable and consistent environment for the developing chicks.
However, you should still check the temperature regularly and adjust the heat source as needed to maintain a consistent temperature of around 99-101°F.
After a few days, you can also check the eggs for signs of development by candling them. This involves shining a light through the egg to see the embryo inside.
If the egg is fertile and developing, you should be able to see veins and a dark spot indicating the embryo. If an egg is not fertile, it will appear clear or have a small white spot.
Candling can also help you identify any problems with the development of the chick, such as a lack of growth or abnormalities.
Wait for the eggs to hatch
Once the eggs have been incubated, it’s important to wait patiently for them to hatch. Quail eggs usually take around 16-18 days to hatch, but some may take longer.
During this time, it’s important to avoid disturbing the eggs and to maintain a consistent temperature and humidity level.
Resist the urge to check on the eggs too frequently, as this can cause unnecessary stress to the developing chicks.
Instead, try to be patient and wait for the chicks to hatch on their own. Once they do hatch, you can provide them with the necessary care and support to ensure their health and wellbeing.
Help the chicks hatch:
If the chicks haven’t hatched after 18 days, you can help them by gently peeling away the shell and membrane around the air sac. Be careful not to damage the chick or its blood vessels.
Remember, hatching quail eggs without an incubator can be a time-consuming process that requires patience and attention to detail.
It’s important to monitor the eggs regularly and maintain a consistent temperature and humidity level for the best chance of a successful hatch.
Creating a Homemade Incubator with a Box

Find a suitable box
To make a homemade incubator, the first thing you need is a suitable box. A cardboard box or plastic storage bin can work well, as long as it’s large enough to hold the eggs you want to hatch.
You can also use a foam cooler or a wooden box, but make sure it has a lid or cover that can be securely closed to maintain the temperature and humidity.
When selecting a box, consider the number of eggs you want to hatch and make sure the box has enough room for them to be spread out in a single layer without touching each other. This is important for proper heat distribution and air circulation.
Once you’ve found a suitable box, you’re ready to move on to the next step.
Add insulation
Next, you’ll want to add some insulation to the box. This will help to keep the temperature stable and prevent any unwanted fluctuations. You can use things like Styrofoam, bubble wrap, or towels to line the inside of the box.
Make sure to use enough insulation so that the box retains heat well, but not so much that it becomes too crowded for the eggs.
Install a heat source
When it comes to installing a heat source in your homemade incubator, there are a few options to consider.
One option is to use a lamp, which can provide a consistent source of heat. To use a lamp, you’ll want to position it in a way that it shines on the eggs without directly touching them.
This will help ensure that the eggs are heated evenly and don’t become too hot.
Another option is to use hand warmers or heating pads, which can be placed underneath the box to provide warmth.
This can be a good option if you’re looking for a more portable solution or if you don’t want to worry about positioning a lamp.
Regardless of which heat source you choose, be sure to monitor the temperature inside the box regularly to ensure that it stays within the desired range.
Add a thermometer
To ensure that the eggs are developing correctly, it’s crucial to keep the temperature inside the box at a consistent level. Adding a thermometer will help you monitor the temperature and make adjustments if needed.
Be sure to place the thermometer near the eggs, but not directly touching them, to get an accurate reading.
This will allow you to make any necessary adjustments to the heat source and maintain the ideal temperature range for successful incubatio
Adjust the temperature
To ensure the success of your homemade incubator, you’ll need to adjust the temperature to maintain a consistent and optimal environment for your quail eggs.
Start by monitoring the temperature using the thermometer you placed inside the box.
If the temperature is too low, adjust the heat source or insulation to increase it. If the temperature is too high, try moving the heat source away from the box or adding more insulation to decrease it.
It may take some trial and error to find the perfect temperature range, but aim for around 99-101°F, which is the ideal range for quail egg
Add humidity
To ensure that your quail eggs have enough humidity to hatch, you’ll need to add some moisture to the incubator.
One way to do this is to place a shallow tray of water at the bottom of the box, which will create a humid environment as the water evaporates.
Alternatively, you can mist the eggs with water using a spray bottle every day or two to help maintain the appropriate level of humidity.
Turn the eggs
To ensure proper development of the embryos inside the quail eggs, it’s important to turn them regularly. You can do this by gently rotating them several times a day, preferably at least three times, to prevent the embryos from sticking to the inside of the shell. You can do this by hand, but if you have a lot of eggs, it may be easier to use an egg turner.
Wait for the eggs to hatch
Once the incubation period is over, wait for the eggs to hatch. Be patient, as the hatching process can take several hours or even a whole day.
Keep an eye on the eggs and listen for chirping sounds, which indicate that the chicks are starting to hatch.
Once the chicks have hatched, leave them in the incubator for at least 24 hours to dry off and rest before moving them to a brooder.
Caring for your Quail Chicks
Congratulations, your quail chicks have hatched! Now it’s time to take care of them to ensure their health and growth. Here’s what you need to do:
Provide food and water
Proper nutrition and hydration are essential for the health and growth of quail chicks. A high-protein diet is important for their development, and commercial chick starter or a mix of finely chopped hard-boiled eggs and chick feed are good options to provide the necessary nutrients.
Fresh water should be available to them at all times, which can be provided by placing a shallow dish of water in their enclosure. It’s important to keep an eye on the chicks to ensure they are eating and drinking enough.
If you notice any signs of dehydration or lethargy, it may be necessary to adjust their diet or provide additional support to promote their health and wellbeing.
Keep them warm
Proper temperature regulation is crucial to the health and wellbeing of quail chicks, particularly during the first few weeks of their life.
To keep them warm, a heat lamp or brooder can be used to maintain a consistent temperature of around 95-100°F for the first week.
The temperature can then be gradually decreased by 5°F each week until the chicks are fully feathered.
It’s important to monitor the temperature regularly to ensure that it stays within the appropriate range, and to make adjustments as necessary.
Providing a safe and warm environment is essential for the healthy development of quail chicks.
Keep them safe
Quail chicks are vulnerable to predators and should be kept in a safe and secure environment. Keep their brooder clean and dry, and provide them with bedding such as paper towels or pine shavings.
Additionally, ensure that their water and food containers are not easily tipped over and are regularly cleaned to prevent the spread of bacteria.
If you plan to house your quail outside, make sure their enclosure is secure and protected from predators such as raccoons, snakes, and birds of prey.
Monitor their growth and development
As your quail chicks grow, monitor their progress closely. Check that they are eating and drinking regularly, and keep an eye out for any signs of illness, such as a lack of energy or appetite.
Taking these steps will help ensure that your quail chicks grow up healthy and strong.
Some potential challenges of hatching quail eggs without an incubator include weak or sick chicks.
If you notice any quail chicks that are weaker than the others, you can provide them with extra care and attention such as giving them a separate feeding dish or adding electrolytes to their water.
If a quail chick becomes seriously ill, it may be best to seek veterinary care.
Can I Hatch Store-bought Quail Eggs?
It is possible to hatch store-bought quail eggs, but the success rate may vary. The eggs need to be fertile and not too old, as the viability of the eggs decreases over time. However, many store-bought quail eggs are not fertilized and are intended for consumption rather than hatching. It is best to purchase eggs from a reputable source or a local farmer who breeds quail specifically for hatching. Additionally, proper incubation and care of the eggs is crucial for a successful hatch.
How to Candle Your Store-bought Quail Eggs
Candling is a process of examining the contents of an egg by holding it against a bright light to determine if it is fertile or not. Here’s how to candle your store-bought quail eggs:
- Choose a dark room and a bright light source, such as a flashlight or a candler.
- Hold the egg gently against the light source with one hand and use the other hand to cover the edges of the egg, creating a dark background to make it easier to see inside.
- Look for the air cell, which is the small pocket of air that forms at the top of the egg as it ages. The air cell should be visible as a round or oval shape.
- Next, look for the embryo or the presence of blood vessels. If the egg is fertile, you should see a network of blood vessels and a small dark spot, which is the embryo.
- If you don’t see any blood vessels or embryo, the egg is likely infertile.
Candling can help you identify fertile and infertile eggs, which is useful if you plan to incubate the eggs. By removing infertile eggs, you can improve the chances of successful hatching. It’s also a fascinating way to learn about the development of your quail eggs.
Can quail eggs hatch on their own?
Quail eggs can hatch on their own if they are laid in a suitable nesting environment and conditions are optimal for incubation.
However, it’s important to note that quail eggs are fragile and require specific conditions, such as consistent temperature and humidity, for successful hatching.
In the wild, quail will typically lay and incubate their eggs in nests on the ground, but it’s unlikely that they will hatch without proper care and conditions.
If you want to hatch quail eggs, it’s recommended to use an incubator or provide an artificial nesting environment with controlled temperature and humidity to ensure a higher chance of successful hatching.
How long can quail eggs go without incubation?
Quail eggs can last for up to 2 weeks without incubation if stored properly. It’s important to store them in a cool, dry place, preferably at a temperature between 55 to 68 degrees Fahrenheit and with a humidity level of 70 to 80%.
However, the longer you wait to incubate them, the lower the hatch rate will be. It’s recommended to incubate quail eggs within 7 days of laying for the best chance of hatching success.
Wrapping things up…
Hatching quail eggs without an incubator can be a challenging but rewarding process for those who are interested in natural hatching methods.
By using basic tools and techniques such as proper temperature and humidity control, regular egg turning, and careful observation, you can successfully hatch quail eggs without the need for an expensive incubator.
Remember, if you are new to hatching quail eggs, it’s important to do your research and gather as much information as possible before getting started.
Additionally, seeking advice from experienced quail breeders or joining a community of backyard quail enthusiasts can be a valuable resource for troubleshooting and support.
If you enjoyed reading about how to hatch quail eggs without an incubator, we invite you to explore our other articles about pets and nature. Don’t forget to leave a comment below with your thoughts and share this content with others who might be interested!